Return of the Observer

Hi Everybody,

These past months have been somewhat difficult. My telescope was experiencing technical difficulties. However, I was able to resolve the issues, and I can continue observing now. Here is my recollection of my latest observations:

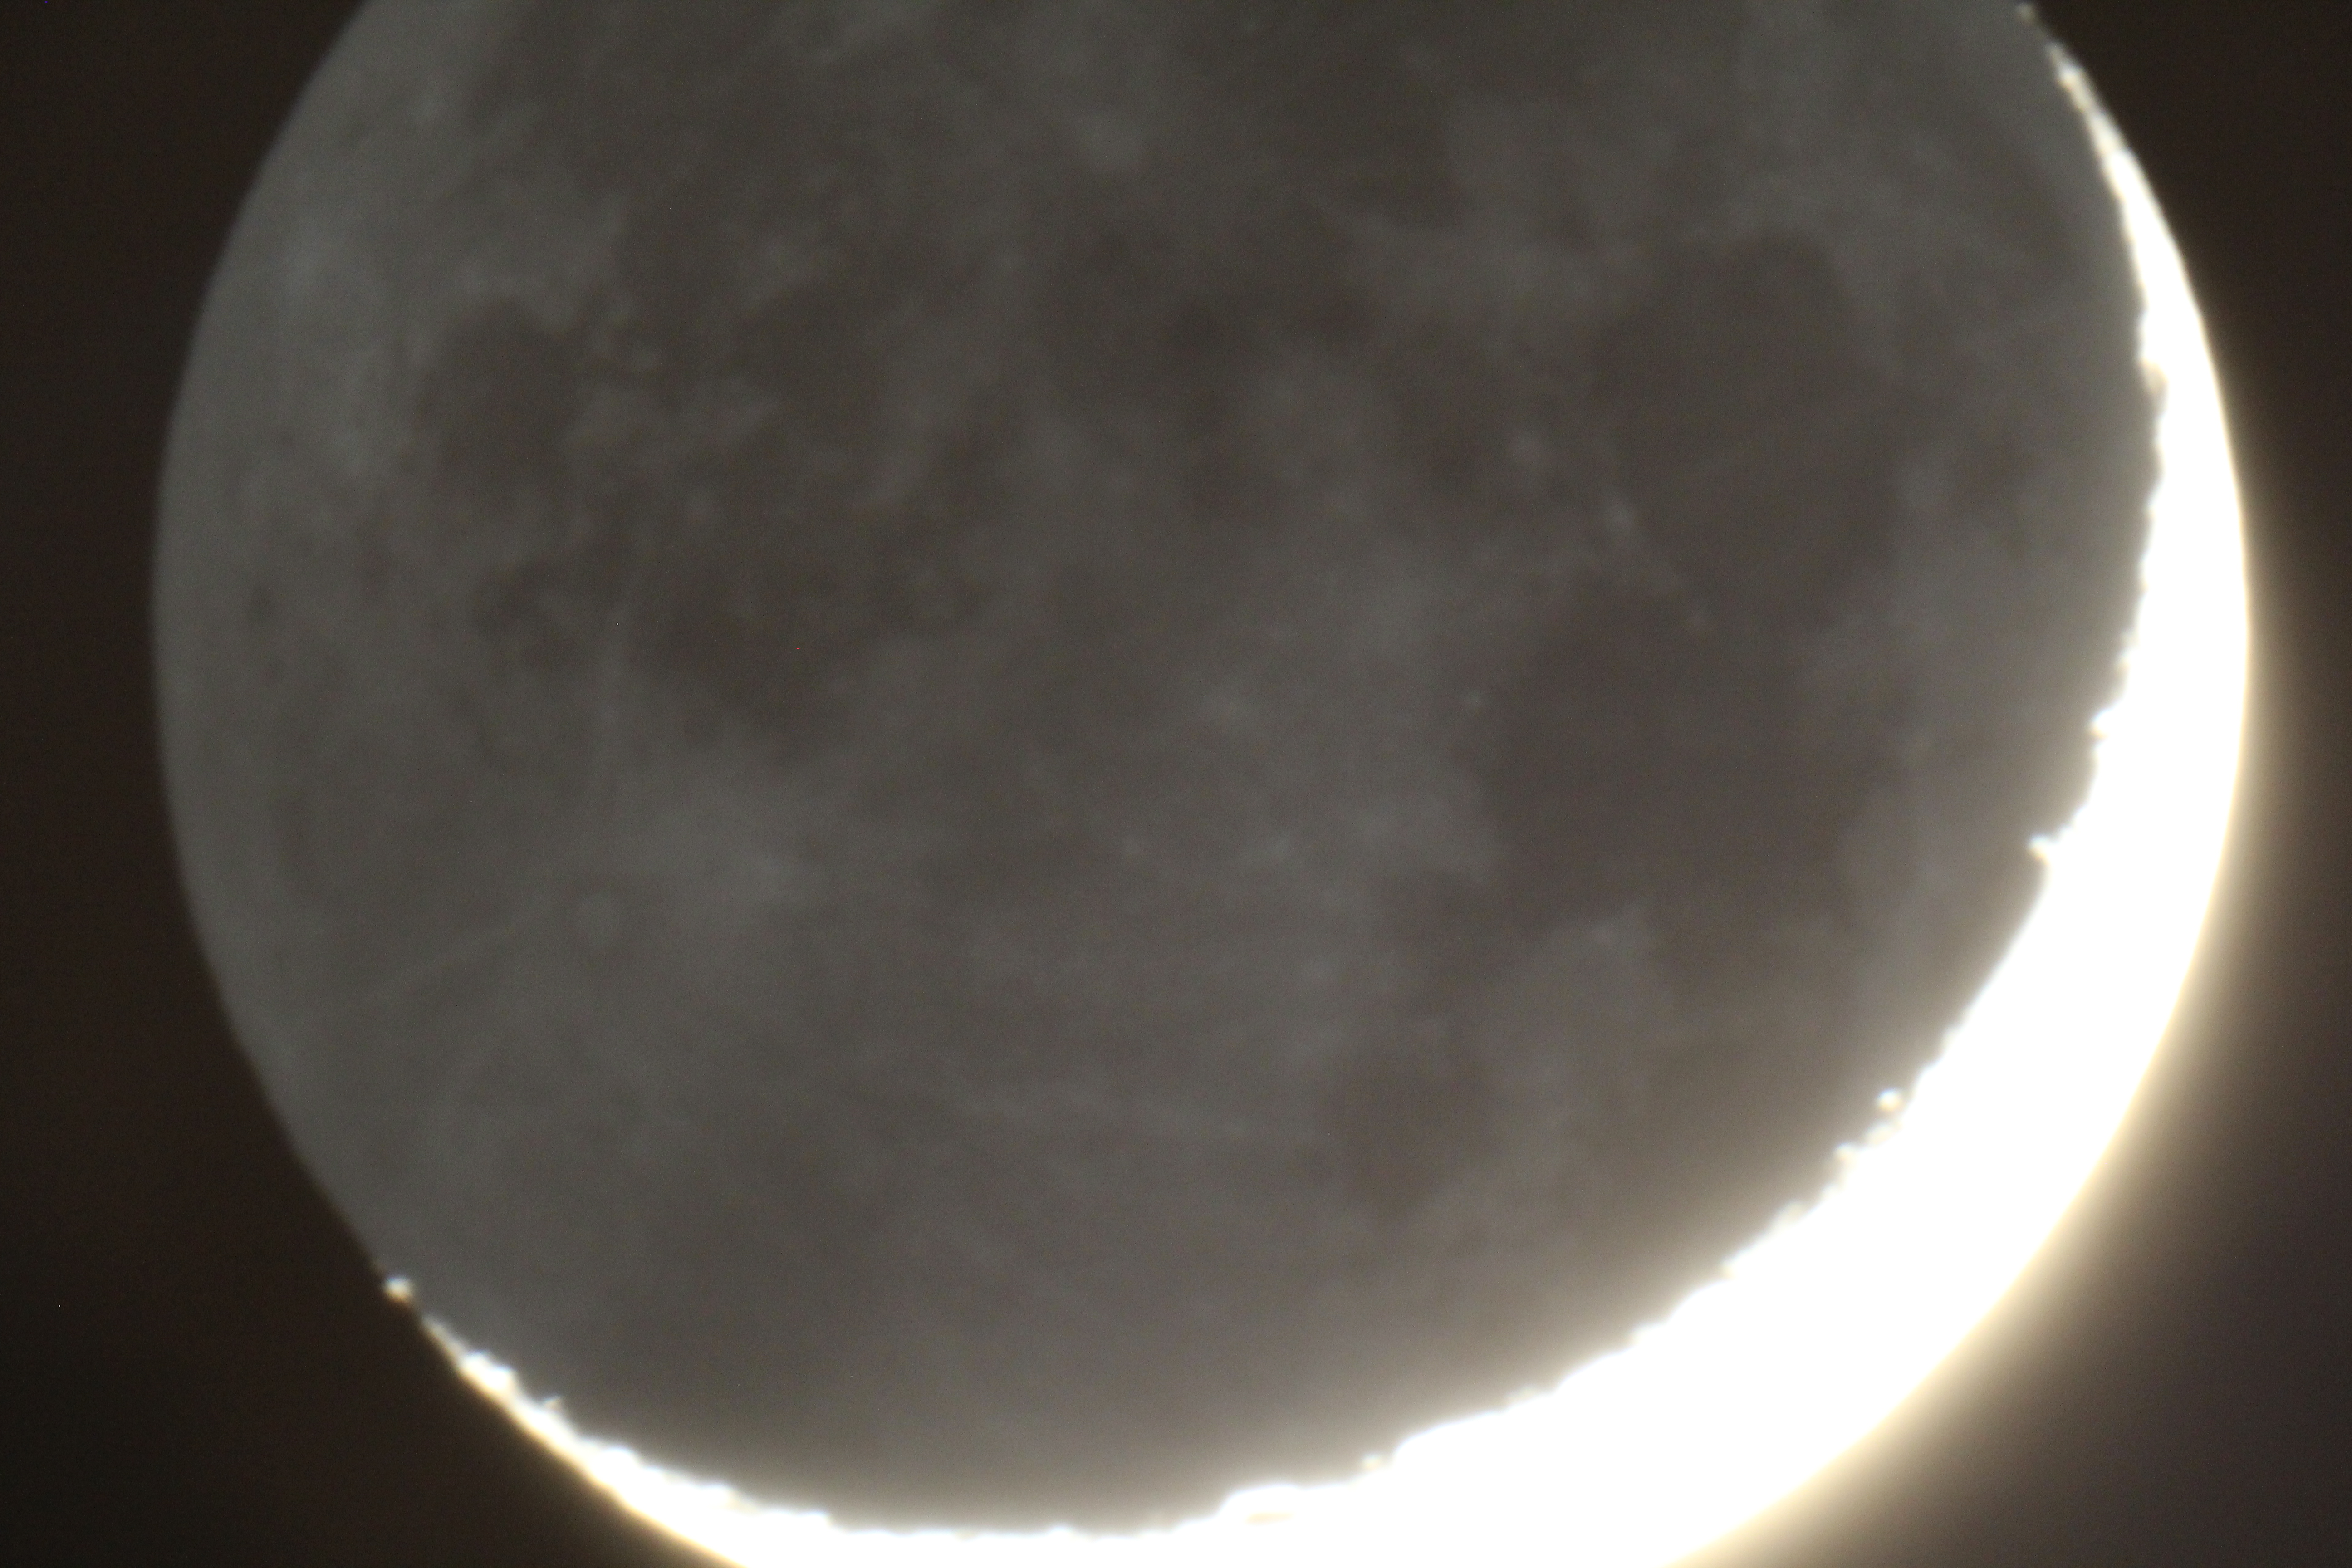
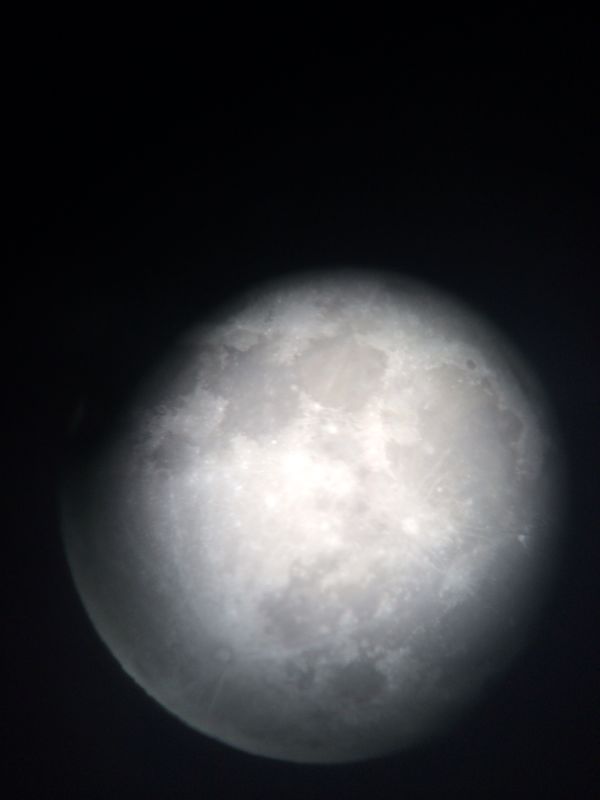
During the night of Saturday March 8, 2014 the skies were clear. Before that, an old Newtonian was discovered in my family’s closet. It’s a cheap one with only 30x magnification, but works nonetheless. That night, I looked at the moon with it. It definitely projects an image, but not a clear image. It looked very dusty. The image is not as good as my 8″ SCT (Schmidt-Cassegrain Telescope). After observing the moon, I decided to take my SCT outside the driveway to find Jupiter.

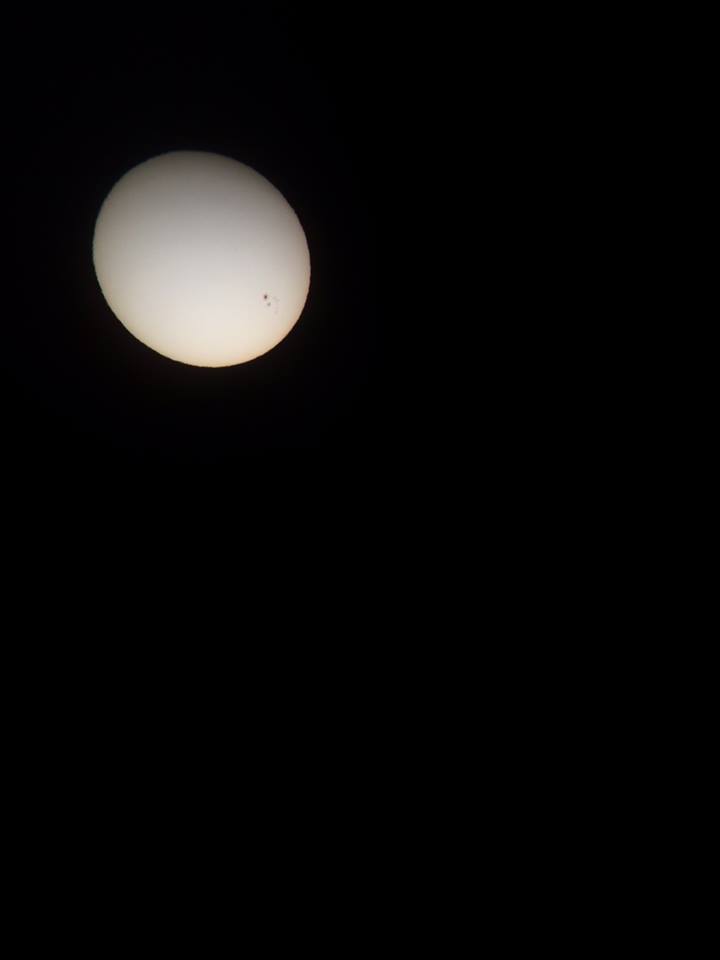
Because of my issues with my telescope, I had to recalibrate my finderscope with my Telescope. Luckily, the Moon was above the horizon. I was able to find the moon after some struggle, and calibrate my equipment with it. It was satisfying to see the moon up close since my telescope developed problems. Pointing away from the light side of the moon I saw, without light interference, how the dark side of moon and the darkness of the sky look compared to each other. It was intriguing.

Sketch of the Moon meshing with space.

Sketch of the Moon meshing with space.

After that, I decided to find and look at Jupiter. It was easy to find Jupiter, falling to the horizon on the western Sky. Looking at it through my 25 mm eyepiece, it looked the same as always. In addition, three of its four moons are visible. It was lovely. However, I had an idea. The newtonian telescope that my family found has a 20 mm eyepiece. I know that when you divide the focal length of the telescope with the focal length of the eyepiece, you get the magnification of the telescope. A 2032 mm telescope with a 25 mm eyepiece will yield 80x magnification. Knowing that, I decided to put the 20 mm eyepiece from the newtonian onto the SCT. If the math is right, then my telescope should have 101.6x magnification and, as a result, Jupiter should appear larger. I put on the eyepiece, and then my put my eye on the eyepiece, and I saw a slightly bigger Jupiter. It was beautiful. If the math continues to hold, then I plan on getting smaller eye piece to get closer to Jupiter. It was a step forward in my astronomical journey.

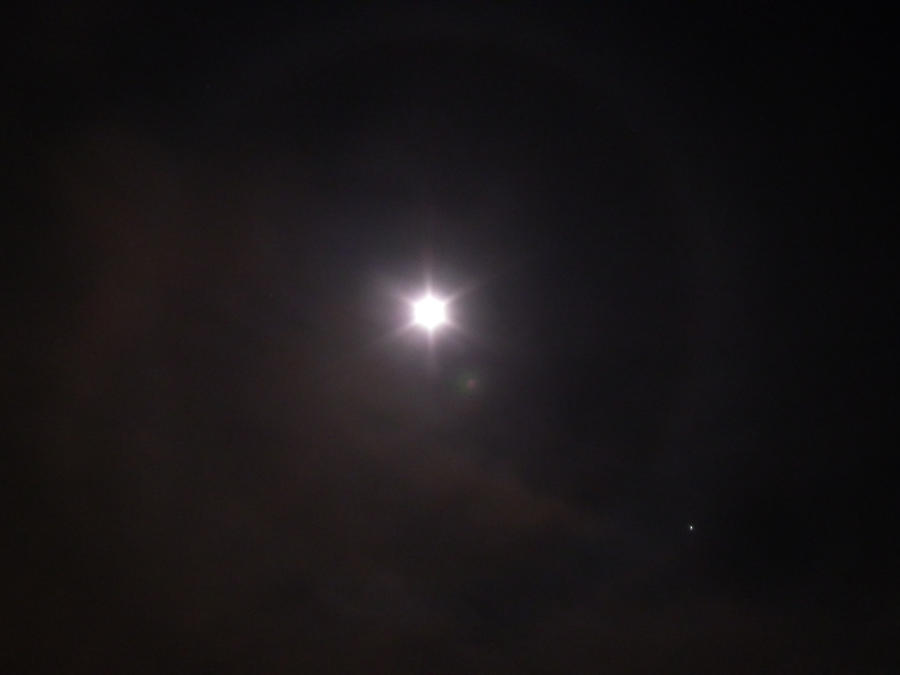
My next object I wanted to observer were the galaxies located at opposite sides of Benetnasch, which is part of the Big Dipper. It took a while to set up. I had to dig out an area of snow in the backyard to place my telescope. After a while, I was able to safely move my equipment to the dug out area, where I set up my equipment. I went about aligning my telescope to the limited about of stars visible. The first time failed for some reason. However, the second time was a success. I pointed my telescope towards the big dipper scanning for that object. However, I failed to find anything. During my search, I stumbled upon a star that had a clear halo around it. It was quite amazing to see such a star like that. I was thinking it was a deep sky object. However, I didn’t know. But it did look like this:

The star halo I saw was a bit more pronounced than the image.

Looking at my clock, I realized it was three in the morning. Daylight Saving Time had already come into affect, which means it was actually four in the morning. Knowing that, and that the cold is starting to get to me, I decided to pack it in for the night bringing all my equipment inside safely.

Overall, It was a successful observation. I saw the beauty of the moon, Jupiter, and an intriguing star. When I was doing research and talking to experts, I learned that it might be a deep sky object with only the heart visible, either M51 or the Ring Nebula. It’s interesting that a galaxy could look like that to my eye. However, I can’t be sure; not until I see it again and image it. I have taken many steps forward in my astronomical observations. I hope to continue that in the coming days.

IMAGES USED

Deep Sky Observer – The Orion Nebula

On January 21, 2014, the sky was clear again. Therefore, I decided to take my telescope out once more. Outside was a temperature of -18 oC. It was not that windy. I set up on my driveway, which had a great view of the constellation Orion. My goal for this session was to find the Orion Nebula once more and properly image it.

When everything is set up, I align my telescope to two stars: Betelgeuse, and Mirfak. It was a successful alignment. After alignment, I slewed to M42. I looked at it through my eyepiece, and I saw the glorius green cloud of the Orion Nebula, also known as M42. Since I already tried taking an image with the DSLR, I tried to image it using the CCD Camera.

For those who don’t know, A CCD Camera is a camera that uses a chip to collect the light and create an image from it. CCD stands for Charged-Coupled Device. It is a major advancement in digital imaging technology. It is used not only for light detection, but when high-quality images are needed. The first images I took, such as my triple-transit Jupiter image, or my Saturn image, were with a CCD camera.

After fiddling with the telescope, eye piece and CCD camera, I was able to find an image of three stars. I don’t know if that was M42, however, I was happy to be able to image far away stars from my CCD camera, designed for planetary imaging. Unfortunately, after processing the video footage, I realized it was not M42, but were three stars that were poorly focused. After filming the stars for a few minutes, I decided to stop CCD imaging the stars. I was determined to find M42 though.

Orion Nebula Stars captured using CCD Camera

Orion Nebula Stars captured using CCD Camera

Therefore, I decided to use the DSLR Camera again. I eventually found M42, and took a few long exposure images of it. Looking at them now, it is much clearer this time around, but not at the level that I want it to be at. I believe there might be a focusing issue on my telescope. I’ll need to look into that. Below is the image of the Orion Nebula:

The Orion Nebula

The Orion Nebula

During my imaging attempts of M42, I went to the side of my house, and I saw the Big Dipper, clear as night, between my house and my neighbour’s house. Seeing it at its position inspired me to image it, but at a later time, after Jupiter.

After imaging M42, I set my sight to CCD image Jupiter. However, before I could do that, I see my computer has restarted and repairing itself. Waiting for it, I realize that the computer is on a cycle that prevents the operating system from booting. I don’t know why, but I believe it was because of the intense cold prevented the proper functioning of my computer. Therefore, I decided to take my computer inside to warm up. With my computer out of order, I decided to focus my attention on capturing that image of the Big Dipper.

I relocated my set up to the dark area between my house and my neighbour’s. I set the camera on top of my piggyback mount. I then set the telescope to capture many long exposure images of the sky. They turned out beautifully.

Wide Angle View of Stars

Wide Angle View of Stars

The Big Dipper Between Two Houses

The Big Dipper Between Two Houses

Stars with Jupiter in the sky

Stars with Jupiter in the sky

Note that on the center-bottom portion of the images, my telescope was visible.

After I was satisfied in the quality and number of images taken, I decided to refocus my attention on Jupiter. I went back inside to obtain my laptop. At the same time I also went to swap out the batteries. To conserve used batteries, I reused a set of old batteries having warmed up to room temperature, thus allowing any extra charge to be used up. I went outside and replaced the batteries.

I set it up and I set the telescope to realign itself to Jupiter. However, the telescope was starting to give me a No Response 17 code. That means that my hand controller lost contact with the Altitude motor, which means I had no up or down capabilities. I conjectured it to being exposed to the cold for so long. However, I also read that it could be due to the used batteries having been completely drained. Regardless of why, I decided to call it a night. I brought all my equipment back in, and got warm.

That night was not only quite successful, but has been the busiest I had ever been. I ran back into my house to get equipment more times than any other time. I got a better image of M42 despite it not being at the quality I desire it to be. I was able to image a farway star using CCD. I was also able to get a lot of long-exposure images of the big dipper and the night sky. Unfortunately, I wasn’t able to image Jupiter. The next time I observe, I will image Jupiter. I also discovered focusing issues when I use my DSLR camera. It will have to be resolved if I want to get better images. It has been a great learning experience, and I hope to do it again.

Before I conclude the post, I have one announcement to make:

  • The Facebook page is officially live. If anybody has any questions, feel free to ask them there. The link is: https://www.facebook.com/jolyastronomy

Thank You for following my blog. I hope you enjoy it. Happy Observing!

WORK CITED

http://en.wikipedia.org/wiki/Charge-coupled_device

http://www.celestron.com/c3/support3/index.php?_m=knowledgebase&_a=viewarticle&kbarticleid=2434

The Lunar Observer – Mares and Craters

On January 20, 2014, the sky cleared again just in time for the bitter cold (-20 degrees Celsius). Determined to observe the night sky, taking what I learned from my last observation into account, I decided to point my telescope at the moon.

After aligning my telescope at the moon, I looked through the eyepiece and saw the glory of the waning gibbous moon. I saw all the mares, and craters, especially the ones that were located at the terminator line, which separates the illuminated side and the dark side. It was beautiful. My mission for the night was to find six of the twelve mares and six of the twelve craters on my list for my Observer’s Certificate. Those features that are on my list are:

Mares Craters
Mare Crisium Crater Petavius
Mare Fecunditatis Crater Cleomedes
Mare Nectaris Crater Posidonius
Mare Tranquillitatis Crater Theophilus
Mare Serenitatis Crater Aristoteles
Mare Vaporum Crater Ptolemaeus
Mare Frigoris Crater Plato
Mare Imbrium Crater Tycho
Mare Nubium Crater Clavius
Sinus Iridium Crater Copernicus
Mare Humorum Crater Gassendi
Oceanus Procellarum Crater Gimaldi

For those who don’t know, mares, which translate to seas, are the dark, flat areas on the Moon. They were formed from ancient volcanic eruptions. The mares are much younger than the surrounding areas because they have fewer craters than their surroundings. This suggests that they have formed relatively recently. Interestingly, the majority of the mares on the moon are on the near side of the moon, visible from Earth. Scientists still debate why that is the case. The Observer’s Certificate requires me to find six mares for the certificate.

In addition, I need to find six Craters. Surrounding the Mare are the highlands, which are the lighter features on the Moon that are riddled with craters. Craters are circular formations of varying depth, size, and albedo on the moon. They were formed as a result of collisions with asteroids. Depending on the size, those asteroids could leave a large crater over many km long in diameter like Crater Ptolemaeus at 153 km, or it can leave a small dent like Crater Grace at 1 km. Craters are best viewed at the terminator line, where the mixture of darkness and light give it a very interesting appearance. The image below is the Lunar surface up close with Mares and Craters visible.

Moon Closeup 2

The top-right of Image shows a Mare. Note the many craters in the image.

Looking at the moon, I saw a lot of flat surfaces, and craters, and white areas. At the beginning, I didn’t know where to start. It felt (actually, it was) like looking at another world. I soon decided to start my search at the terminator line. I saw a mare there, but I couldn’t identify it. I also saw a crater right at the terminator line. Eventually, I saw an intense, white crater in the western portion of the moon. Luckily I found a map to refer to, which led me to discover that it is the Crater Copernicus. That discovery gave me a reference point to search for the other features.

Looking at the map, I conjectured that the mare near the terminator line was Mare Crisium. It was very circular, and it connected to the mare beside it. However, I wasn’t certain. I decided to hold off on checking it off my list. Looking around, I found, to the west of Copernicus, a large mare that covered a large portion of the moon. I found that to be the Oceanus Procellarum. I checked it off my list. Soon enough, I decided to return to the unknown mare at the terminator line. I still couldn’t figure out what mare it is. I looked at the same mare on the map, but both images didn’t add up. I suspected that it wasn’t Mare Crisium after all. However, something caught my eye. It was the crater at the terminator line. After looking at my telescope and at the map again, I confirmed that what I saw was Crater Posidonus. This was significant not only because I checked off another object off my list, but I found the terminator line on the map. From that I realized that Mare Crisium is in the shadowed part of the moon, and that the Mare adjacent to Crater Poseidonus was Mare Serenitatis. It propelled me forward in my mission becauase I was able to know, on the map what to look for and what not to look for. I soon continued on my mission.

Soon enough, I found Mare Imbrium located beside Mare Serenitatis. I also realized that another mare near the terminator line was actually Sinus Medii, which was not on my list. Moving forward, I struggled to find more objects for a while. However, I realized that the orientation of the image of the moon on my telescope was confusing me. It prevented me from finding the right lunar features. Therefore, I decided to look at the image a different way. As a result, I was able to find Mare Frigoris, Mare Vaproum, and Mare Nubium. I was also able to find Mare Cognitum before Mare Nubium, but it was not on my list. In between finding those Mares, I was able to find, Crater Grimaldi at the very edge of the moon; Crater Ptolemaeus, which is close to Mare Nubium and Sinus Medii; Crater Plato, near Mare Frigoris, and Mare Imbrium; and after a lot of searching, I finally found Crater Gassendi.

It took me two hours to find those twelve objects. I even had to change the batteries of my telescope before I found Crater Gassendi. However, it was worth it. After that, I decided to call it a night and bring everything back inside to warm up after a cold night.

It was a productive night, which gave me valuable knowledge of the Moon. I hope to keep doing that in the future when the moon is more illuminated.

Here are the links for the maps that I used. They were very useful in identifying and getting acquainted with the Lunar features:

http://www.oarval.org/MoonMapen.htm

http://www.scientificpsychic.com/etc/moonmap/moon-map.html

Before we conclude this post, I have a few announcements:

  1. For those who have any questions about astronomy, I will be setting up a facebook page where you can ask those questions. There are no stupid questions here. If you have a question, I will do my best to answer it.
  2. In addition to my posts, I will regularly post a blog entry talking about a specific topic, such as Formation of Planets, Why the rings of Saturn have gaps, or how stars are born.
  3. In addition to my regular posts, I will post every month an update on astronomical events for the month.

Thank you for following me and I hope you continue to enjoy what you read here.

WORKS CONSULTED

http://en.wikipedia.org/wiki/Lunar_mare

Coursera Class – Introduction to Astronomy.

http://en.wikipedia.org/wiki/Geology_of_the_Moon

http://en.wikipedia.org/wiki/Lunar_craters

http://en.wikipedia.org/wiki/Ptolemaeus_%28lunar_crater%29

http://en.wikipedia.org/wiki/Grace_%28lunar_crater%29

Light Pollution

Four days ago, after a series of cloudy and rainy nights, the sky finally cleared for a rare view of the night sky. Taking advantage of that, I decided to take my telescope out for the night and use my piggyback mount.

A piggyback mount is an attachment for telescopes that allows a camera to be attached on top of it. Using the tracking feature of the telescope, one could take long exposure images of the sky for a long time and avoid sky trails, which occurs when a camera takes a long-exposure image of the stars without compensating for the Earth’s rotation. Below is an example of star trails:

IMG_0161During that night, my goal for the night was to take a long exposure shot of the sky using my piggyback mount. However, I failed to realize that the light pollution in my backyard and the moonlight in the sky would obstruct the view of the stars in the sky, and that seeing conditions for the stars would not be optimal.

When I was taking the pictures of the sky, I was expecting to see crisp black images with stars shining brightly. Instead I got an image with dim stars and a bright background blocking the stars. This is due to the light in the sky blocking the stars. The light is coming from the Moon and from the light pollution.

IMG_0202

An image of Jupiter on a brightly illuminated sky

Light pollution is when artificial light shines at the sky and obstructs the view of the stars. It can come from the car lights, lights from buildings, and especially from streetlights to name a few. Light pollution is most prevalent in urban areas, such as Downtown Toronto, New York, Yerevan, and many other major cities. However, light pollution declines as you move away from the urban centres.

For example, if one was in an urban centre like Downtown Toronto, or Yerevan, and you looked up into the sky, you would likely only see the Moon, the planets, and the odd star. Far out of the city, like in Algonquin park, there is very little artificial light, which will give you an excellent view of the sky, and maybe even the Milky Way.

Light Pollution is a major problem in many cities. However, there are organizations who are committed to reducing the amount of light pollution in our cities. One such cause is: Light-Pollution Abatement Committee operated by the Royal Astronomical Society of Canada. This committee was formed to work with the municipal, provincial, and federal governments as well as with concerned citizens to reduce light pollution and create darker skies for all to enjoy. They encourage people, organizations and governments, to advise each group of the situation at hand and talk to each other and find solutions.

If you want to help as well, iOS users can download two apps that can help one find clearer skies, and help identify light polluted areas. The first one is “Dark Sky Finder”, which is a map of North America, Europe and Australasia that charts out the level of light pollution in certain areas, like Toronto, New York, Sydney, and other cities. The other app is the “Dark Sky Meter”. It allows one to measure the night sky and see how dark it is compared to total darkness. In addition, users can submit the data that they find to the Save Our Stars (SOS) program, which will assist the SOS program in their efforts to chart light pollution in our skies. The links are:

http://www.jshine.net/astronomy/dark_sky/

http://www.darkskymeter.com/

After some time, I decided to call it a night, and brought my telescope into my house.

A few days later, I was thinking about what my priorities should be during this period of the Full Moon. Knowing that the moon and the surrounding light will obstruct my view of the stars, I decided to recommit myself to observing the Moon when it is visible in the sky. When the next clear night comes, I will be there to see the Moon.

Today, I processed a number of images that I took and I achieved this result:

IMG_0198

The night sky post-processed.

IMG_0212

Jupiter through a DSLR Camera. Post-processed

WORKS CONSULTED

http://en.wikipedia.org/wiki/Light_pollution

http://www.rasc.ca/lpa

RASC Solar Observation Event

Hi Everyone,

January 4th was a busy day for me. I woke up at 8 pm, got ready and went to the Ontario Science Centre (OSC) at 9:30 am.

I went to the OSC because the Royal Astronomical Society of Canada (RASC) was hosting an event there. It was a solar observation event. I went to the event to gain experience in the field of Solar Observation.

I arrived there at 10 am. There, I saw a two astronomers with three telescopes set up. One telescope had a Hydrogen-Alpha filter, which blocks out most of the light, leaving only the red emission spectrum line visible. Another telescope used a regular eyepiece that used a white light filter. A third telescope did not have an eyepiece, but it projected the image of the sun onto a piece of cardboard for public viewing of the sun without putting your eye in an eyepiece. In addition, we had two solar observation glasses. The first one used the white-light filter, and the other one, which I brought from home, used black polymer which made the sun appear orange-yellow rather than white.

A total of three astronomers from RASC were there. From 10 – 12 pm, we braved the cold of winter to show the public the sun and to get them curious about astronomy. We had many visitors, including a few members of RASC.

Image

The Sun as viewed from the white-light telescope.

Overall, we had a successful event. Many people braved the cold for just a few extra minutes to witness the majesty of the sun. This event gave me experience in the field of Solar observation, which I can take home and apply it in my astronomical sessions in the future. I hope to do so soon.

WORKS CONSULTED

http://en.wikipedia.org/wiki/H-alpha#Filter

The Orion Nebula

Hi everyone,

In my previous blog post, I had my heart set on going back out in the bitter -16 C cold to image the Orion Nebula, and I did just that.

I took my telescope to the backyard, where I could get a good view of the constellation Orion. After aligning my telescope to Jupiter, I slewed to the stars that represent Orion’s sword. Looking for the green cloud, I saw all of Orion’s stars again in its unique locations and patterns. It was quite a sight to see.

Eventually I was able to find the faint green cloud I found in a previous astronomy session, and I took a series of long exposure photographs of the Orion Nebula with an ISO of 1600. Unfortunately, It wasn’t properly focused, and I had trouble focusing my telescope. I was only able to get one “good” photo of the Orion Nebula. It’s not that focused, but I did my best.

Image

The Orion Nebula. Forgive me, the image is blurry.

After taking a few more long exposure images that were not successful, I decided to call it a night, and go back inside. I brought the eyepiece and camera indoors first, and then the telescope, making sure to use gloves instead of my bare hands. Once indoors, I put all telescopic equipment in its right place, and then warmed up by the fire again.

These two sessions were quite productive. I got my first taste of DSLR astrophotography by taking a two second exposure image of the moon capturing the Old Moon in the New Moon’s Cradle phenomenon. I was able to see Jupiter at close to opposition, despite my failure to image it, and I got my first image of the Orion Nebula. While it is clear I need to work on my astrophotographic skills, I have taken my first steps into it.

Tomorrow will be an early day, for there is another session in the morning. Stay Tuned.

The Old Moon in the New Moon’s Cradle

Hi everyone,

Happy New Year to everyone and Merry Armenian Christmas (January 6th) to all my Armenian friends.

On January 3rd, as the sun set, I noticed in the navy blue sky, that a thin crescent moon was visible in the sky. Therefore, I decided to take my telescope out and take images of the moon.

For Christmas, I got nice additions to my telescope: a new T-Ring and T-adapter for use with DSLR cameras. Therefore, I decided to take the photos using my brother’s DSLR camera, which was a Canon EOS D60.

I took my telescope out in the bitter cold night at -16 degrees celsus, and quickly got it set up aligning it to the crescent moon. Looking at the crescent moon, I saw a small portion of a mare, and many craters on the lower part of the crescent. It was beautiful. Since I was using a DSLR camera, I could take long exposure images, which I could not do using my CCD imager. With that feature, I have the ability to obtain different kinds of pictures of the different bodies of the solar system. I quickly went about taking the photo.

I experimented with the exposure setting, and tried to figure out how to eliminate the wobble that I created by pressing the shutter button. Eventually, I found the right setting for the image and captured a fair number of images of the moon. The moon captured in my images were two second exposure photos with the other settings set to auto. It showed the lit portion of the moon completely white due to the collection of light from the moon, and the dark portion dimly lit. The reason that happened is because the Earth also reflects the sunlight that it receives from the Sun. The reflected sunlight travels to all different directions, and a certain amount of the sunlight hits the moon. This phenomenon is called Planetshine, and it creates this photographic phenomenon called, “The Old Moon in the New Moon’s Cradle.” It is a unique sight for those who know how to find and capture it.

Below is a comparison of the crescent moon and the Old Moon in the New Moon’s Cradle.

Image

The Crescent Moon

Image

The Old Moon in the New Moon’s Cradle

After the Moon set below a row of houses, out of my sight, I decided to focus my attention on Jupiter. It would be reaching opposition the next day, which means it would begin moving backwards relative to the Celestial Sphere, it orbits closest to the Earth, which makes it seem closer than it actually is, and it is visible all night, much like a Full Moon. Since the next day was predicted to be cloudy, I decided to look at it now.

Looking at Jupiter through the DSLR camera was a different (no, difficult!) experience than through the eye piece. Jupiter looked quite over-exposed. Any attempt to take a long exposure image of Jupiter failed as the camera wobbled too much and my telescope tracking feature was not doing a good job at keeping the image still. I didn’t have enough technique to take a good image at that time.

As a result, I decided to pack it in for the night. I took all my equipment inside and got warm by the fire. It would usually be over for the night, but the sky was still clear, and I felt the need to take my telescope out once more. Therefore, I did just that.

Stay tuned for the rest of this blog post.

WORKS CONSULTED

http://en.wikipedia.org/wiki/Opposition_%28planets%29

http://en.wikipedia.org/wiki/Planetshine

A Cold Christmas Night

Last night, three days after the Toronto Ice Storm, Santa brought us astronomers a Christmas gift: Clear Skies! Therefore, I decided to take advantage of it.

My goal for this session was to view a rare astronomical event: the occulation (blockage) of a star by an asteroid. The star was a 10.4 magnitude star (not very bright). The asteroid was a 15.4 magnitude asteroid (dimmer than the star). To see it is a slim to nil chance, but I tried.

At 10:50 pm, I took my telescope out in the bitter cold and got it ready to view the stars in the snow. For the first time, I was able to align the telescope using the SkyAlign feature. In previous sessions, I failed to align the telescope using the SkyAlign feature. Yesterday, I succeeded in that. After aligning the telescope, I got the coordinates for the star in Ra/Dec and Alt/Az coordinates. When the telescope slewed to it, it was behind the trees. I had to readjust the telescope to view it away from the trees. When it came time, I looked into the telescope and I saw small stars. However, I don’t think I saw the star that was to be occulted. It was disappointing, but I wasn’t surprised. I was not prepared or experienced enough to find such a small and unknown object. I decided to move on to other objects on my list.

I first slewed to the bright object in the sky, Jupiter. I saw the beautiful stripes, and its 4 beautiful moons. It’s always a sight to see Jupiter. I can check it off my list now.

The next object I saw is Sirius. One fact about Sirius is that it is a double star system, with a star 2 times the size of the sun, and a white dwarf that already died. Looking at it myself, I saw the star, and I think I saw a bulge from one side of the star, which is probably Sirius B. I can’t be sure until I view it closer. I can now cross the constellation Canis Major off my list.

The next objects I observed are the two brightest stars of Orion: Betelgeuse, and Rigel. I first slewed to Betelgeuse, the bright red supergiant. It was magnificent. I next slewed to Rigel. I had to move my telescope a bit, but I was able to find it. It wasn’t as bright as Betelgeuse though. I was able to cross of Orion off my list of constellations.

I looked into the sky and saw a small cluster of stars, and I saw M45 also known as the Pleades, or the Seven Sisters. It is a star cluster that is visible to the naked eye, and is made up of 7 stars. I decided to  look at it through the telescope. Doing that, I saw the magnificence of the 7 sisters in its formation. It was awe-inspiring. I crossed it off my list under the Deep Sky Objects Category.

Remembering my previous session where I could not see the horsehead nebula due to the battery dying on my telescope, I decided to slew towards Orion’s sword, a collection of three stars that represent the sword of the mythological hunter, Orion. The vicinity of those stars are quite interesting. I see dim stars close together and in interesting patterns that one can’t see without a telescope. The most notable one that I saw was at the middle star. There I saw a dim green-tinted cloud of sorts in the sky. I have never seen that before, but I learned about it in the first few lecture videos in my Astronomy class. I believe I saw M42, otherwise known as the Orion Nebula. This was my first sighting of a nebula. I was very excited, and will explore further in the future.

Image

The Orion Nebula through my telescope imaged using an iPhone 5s.

Continuing my journey, my telescope started to become sluggish and unresponsive, which lead me to conclude that the batteries died once more. With that, I decided to call it a day… but not before manually moving my telescope to the rising Waning Gibbous Moon through the trees. It was a very nice sight and another addition to my list.

After that, I packed up my telescope and decided to call it a night.

Overall, it was a very eye-opening experience. I tried to find a unique star event, however, I failed to find it. I was able to observe Jupiter, Sirius, Betelgeuse, Rigel, The Pleiades, the Orion Nebula, and the Waning Gibbous Moon. It was truly an interesting and productive night, which took me a step further in my astronomy adventure. I hope you will come with me.

WORK CONSULTED

http://en.wikipedia.org/wiki/Sirius

http://en.wikipedia.org/wiki/Pleiades

http://en.wikipedia.org/wiki/Orion_%28constellation%29

http://en.wikipedia.org/wiki/Betelgeuse

Full Moon

Hi Everyone,

Before reporting my latest observational session, I would like to announce that I will be attempting to obtain a “Explore the Universe” Observing Certificate offered by the Royal Astronomical Society of Canada (RASC). The website of the program is: http://www.rasc.ca/explore-universe Wish me luck in my quest to see the stars.

On December 15, 2013, the night sky was graced with a full moon. This one was unusual, because it was not only the last full moon of 2013, but the smallest. That’s because the Moon was at its farthest, or at its apogee, at the time. As a result, it looked smaller than the average full moon. Luckily, the sky was clear at that time. I decided to take my telescope out to view the smallest full moon. It was a really cold night, however there was not a cloud in sight. After the telescope was set up, straight away, I slewed my telescope to the Moon. After getting it in focus, I saw a beautiful full moon with all its mares (grey sea) and mountains. It was beautiful!

Smallest Full Moon

After looking at the moon, I decided to turn my telescope to the constellation Cassiopeia; more specifically,  the star “Schedar”. Looking at the constellation Cassiopeia was part of the requirements to obtain that certificate I mentioned above. It was a bit difficult to find Schedar due to the light pollution in Markham at the time, however, as I was slewing the telescope I couldn’t help but notice a lot more dimmer and farther stars that could not be seen unless with a telescope. It astonishes me how so many stars exist, yet we see only the brightest stars in the sky in places like Markham, let alone Toronto. It was an intriguing sight!

Eventually, I found Schedar. Looking at that star, it was a bright ball of light that outshined all the other stars in its vicinity. A rule I set for myself is to observe the brightest stars before checking off the constellation for my program. As a result, seeing that star allowed me to check Cassiopeia off my list.

After viewing Cassiopeia, I was thinking about whether to call it a night, or continue. After looking at Orion, I remembered how one of the stars was close to the Horsehead Nebula. Therefore, I decided to observe it. Unfortunately, the telescope was not slewing. Pressing the buttons to slew the telescope only nudged it instead. Turning it off for a small amount of time allowed the slewing function to work again, if only for a short time. This led me to conclude that the batteries had died. Having no replacement batteries, I decided to call it a night.

During my December 15, 2013 session outdoors, I observed the full moon at apogee and I observed the star, Schedar, in the constellation, Cassiopeia. It was a good start on my list of objects to observe. Two down, fifty-three more to go.

WORKS CONSULTED

http://www.washingtonpost.com/blogs/capital-weather-gang/wp/2013/12/16/tonights-cold-full-moon-is-2013s-last-and-smallest/